Great news: Allure TestOps 5 is out!
Over the past year, we have made many improvements, and the visual interface has changed beyond recognition. More importantly, the TestOps workflow has become much smoother and quicker. We have put a lot of thought into cutting your time expenditure and improving your safety when working with tests.
We will cover all the improvements of Allure TestOps version 5 in multiple articles; here, we'll concentrate on what's been done with custom fields. However, before we dive into the changes - a word of warning on migration.
Migrating from version 4 to 5
Please note that if you decide to migrate to version 5, your current version should be 4.26.5. Migrating older versions will break your system, you will lose data, and our support team won't be able to recover it. If your current version is older than 4.26.5, you should first migrate to 4.26.5 and only then to version 5.
Migrating requires new configuration files; sources for them are described in the installation section for each type of installation.
Migrating to version 5 also requires merging databases (the new version uses just one database instead of two). The merging process is described here.
If you have any doubts or questions about the merging process, please do not hesitate to consult the support team.
Now, about the changes.
Bulk operations
We have re-introduced bulk operations for custom fields, allowing you to do a lot of work quickly.
Firstly, you can now merge custom field values, i.e. assign the same value to multiple tests.
To do that, open your project and go to Settings > Custom fields. There, select a custom field, and its values will appear on the right-hand side of the screen. Next to each value is an icon that shows the number of tests that have this value:
![]()
You can click it to show the individual tests.
Select multiple values, and a menu will appear at the bottom. There, click Merge:
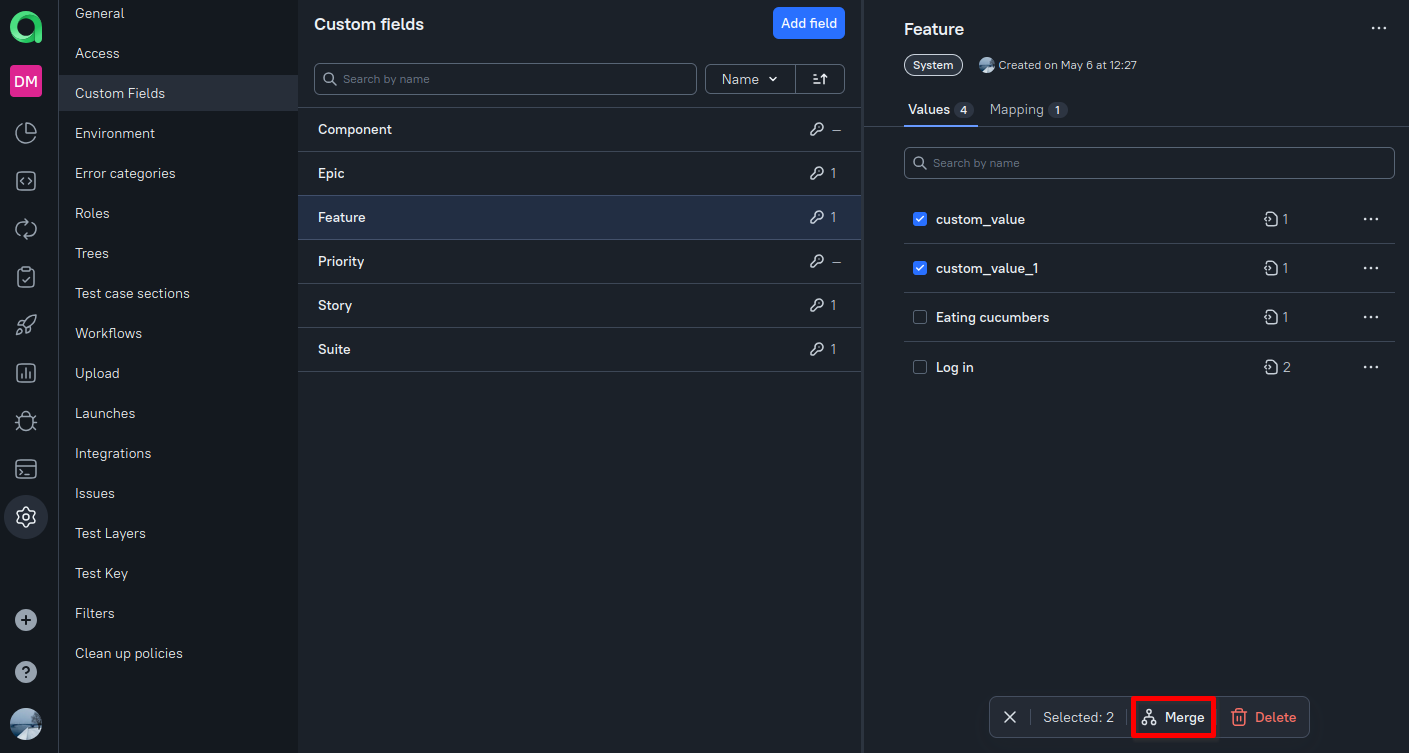
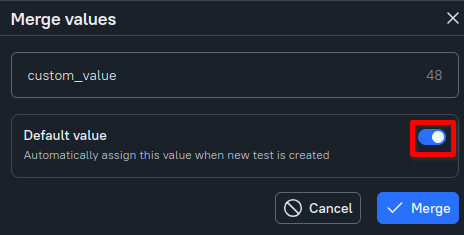
A window will open, prompting you to enter a new value for the selected field. Once you've done that, it will overwrite the current values.
In the Merge values window, there is a Default value option, which allows you to set the new value as a default that will automatically be assigned to new test cases:
In addition to merging, the field screen also allows you to bulk delete the values you've selected:
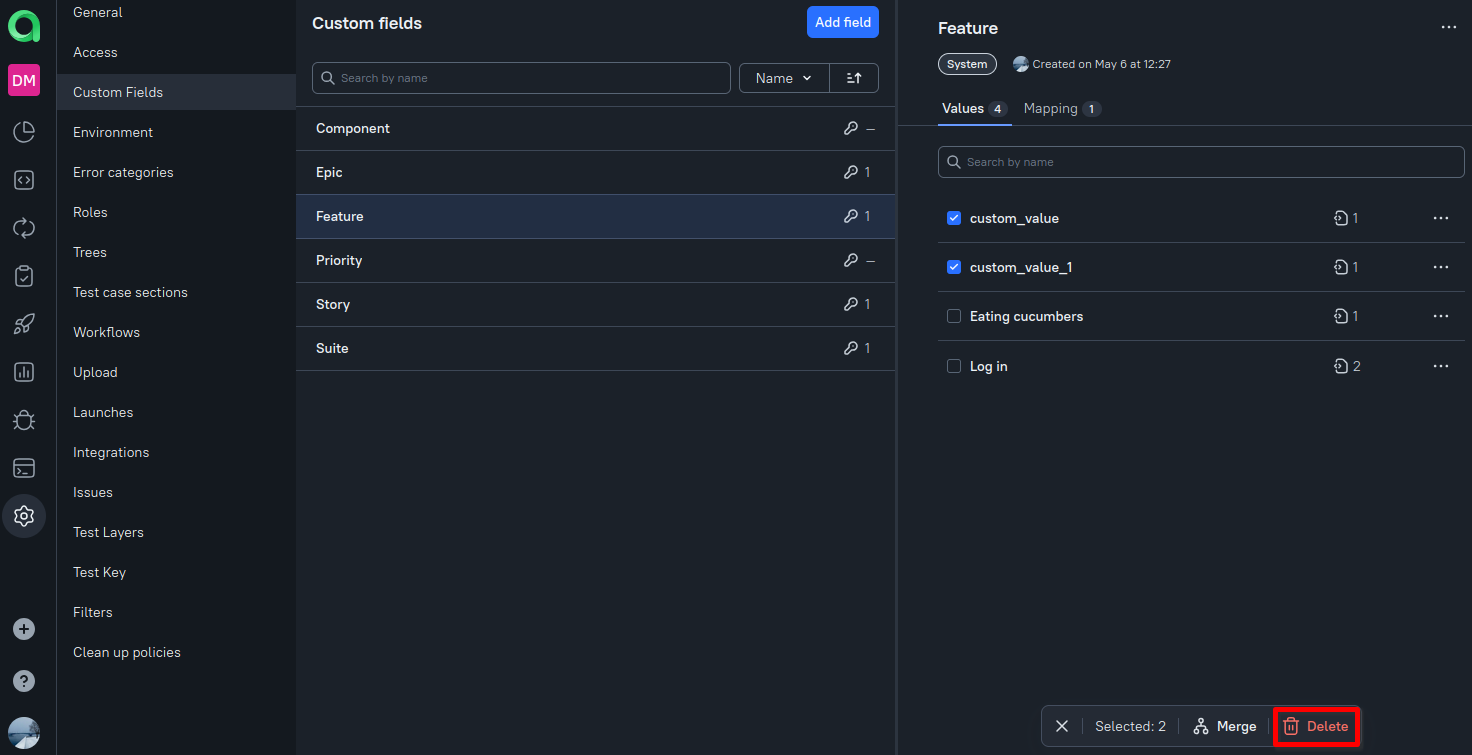
The process for deleting fields has also been changed, so let's discuss that now.
Deleting custom fields
Deleting a field is a multi-step process now.
- (optional) Remove a custom field from each project to which it has been added. For that, go to your project, then Settings > Custom Fields, select your field, click the three dots in the upper right corner, and click Remove from project:
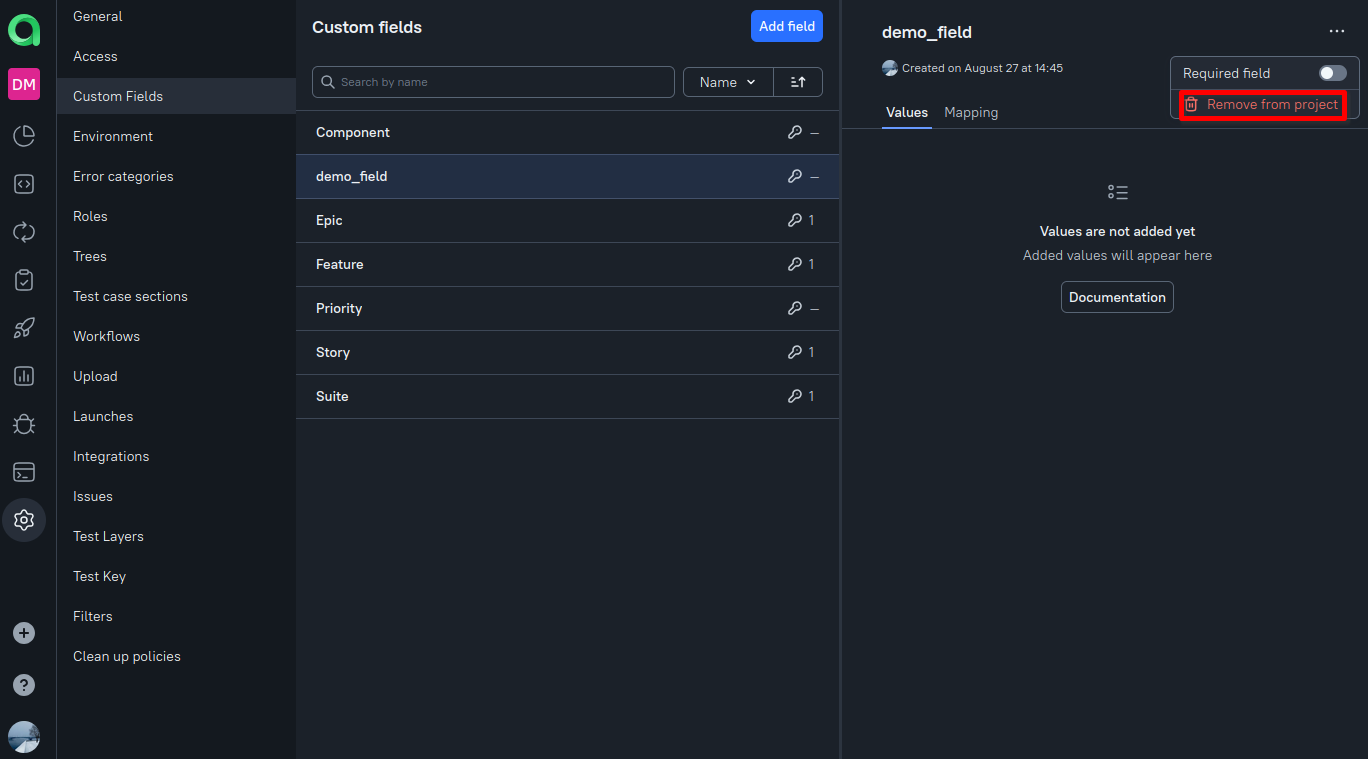
- To delete a custom field, you need admin rights. Click your user portrait in the lower left corner, go to Administration > Custom fields, and select your field. The panel on the right shows the projects the field has been assigned to, so if it's not empty, you can go to those projects and finish removing the field. If it is empty, click the three dots in the upper right corner and click Delete.
- The custom field is not in the Deleted category; from there, you can recover it or delete it permanently:

Deleting a custom field removes it from all projects it has been assigned to; test case trees that use the custom field become unavailable.
The multi-step process ensures that the custom field you are deleting isn't being used anywhere and allows you to recover the field if it's been deleted by mistake.
Required custom fields
Each project already has a separate "scope" of custom fields, so we've taken the next logical step: it is now possible to assign the ‘required’ status independently for each project. You can do it in the Administration section or in project settings.
In the Administration section
- Click your user portrait, go to Administration > Custom fields, and click on a custom field.
- Open the project menu next to the project you need (marked by three dots) and switch on the Required field toggle. The custom field will be marked as required in this project.
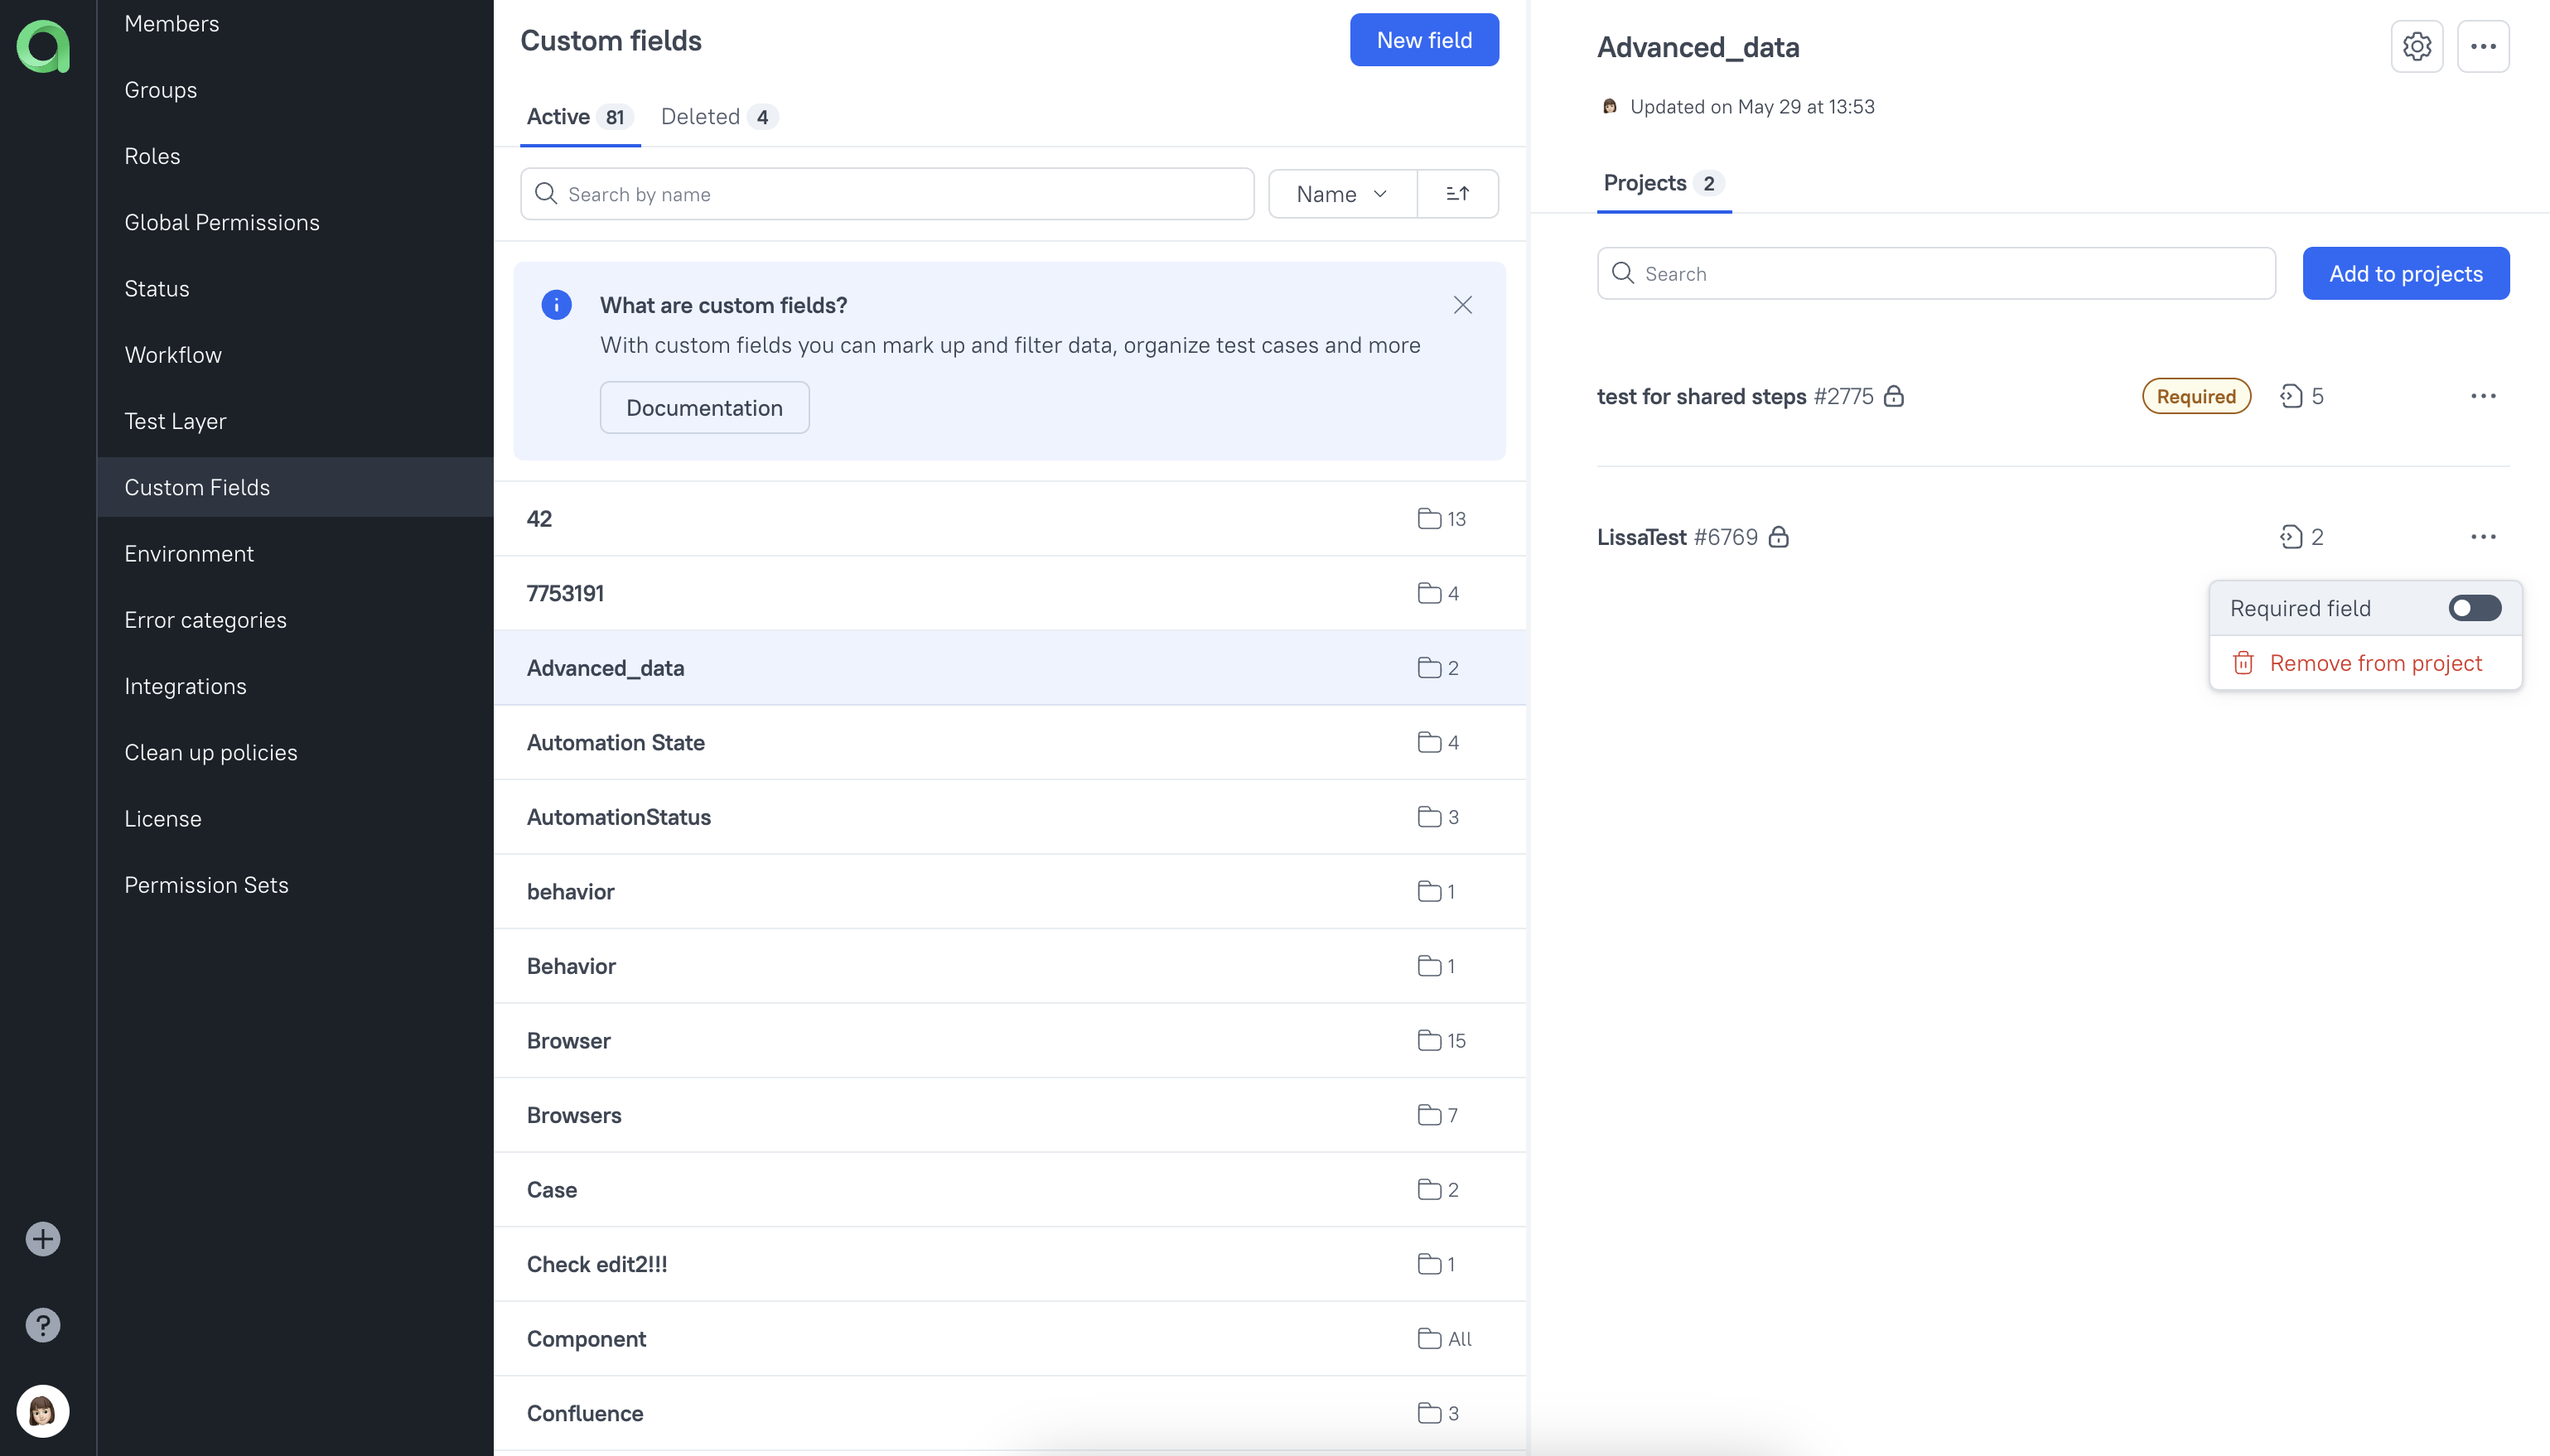
In project settings
- In a project's settings, open the Custom fields subsection and click on a custom field.
- Open the custom field menu marked by three dots and switch on the Required field toggle. The custom field will be marked as required in the current project.
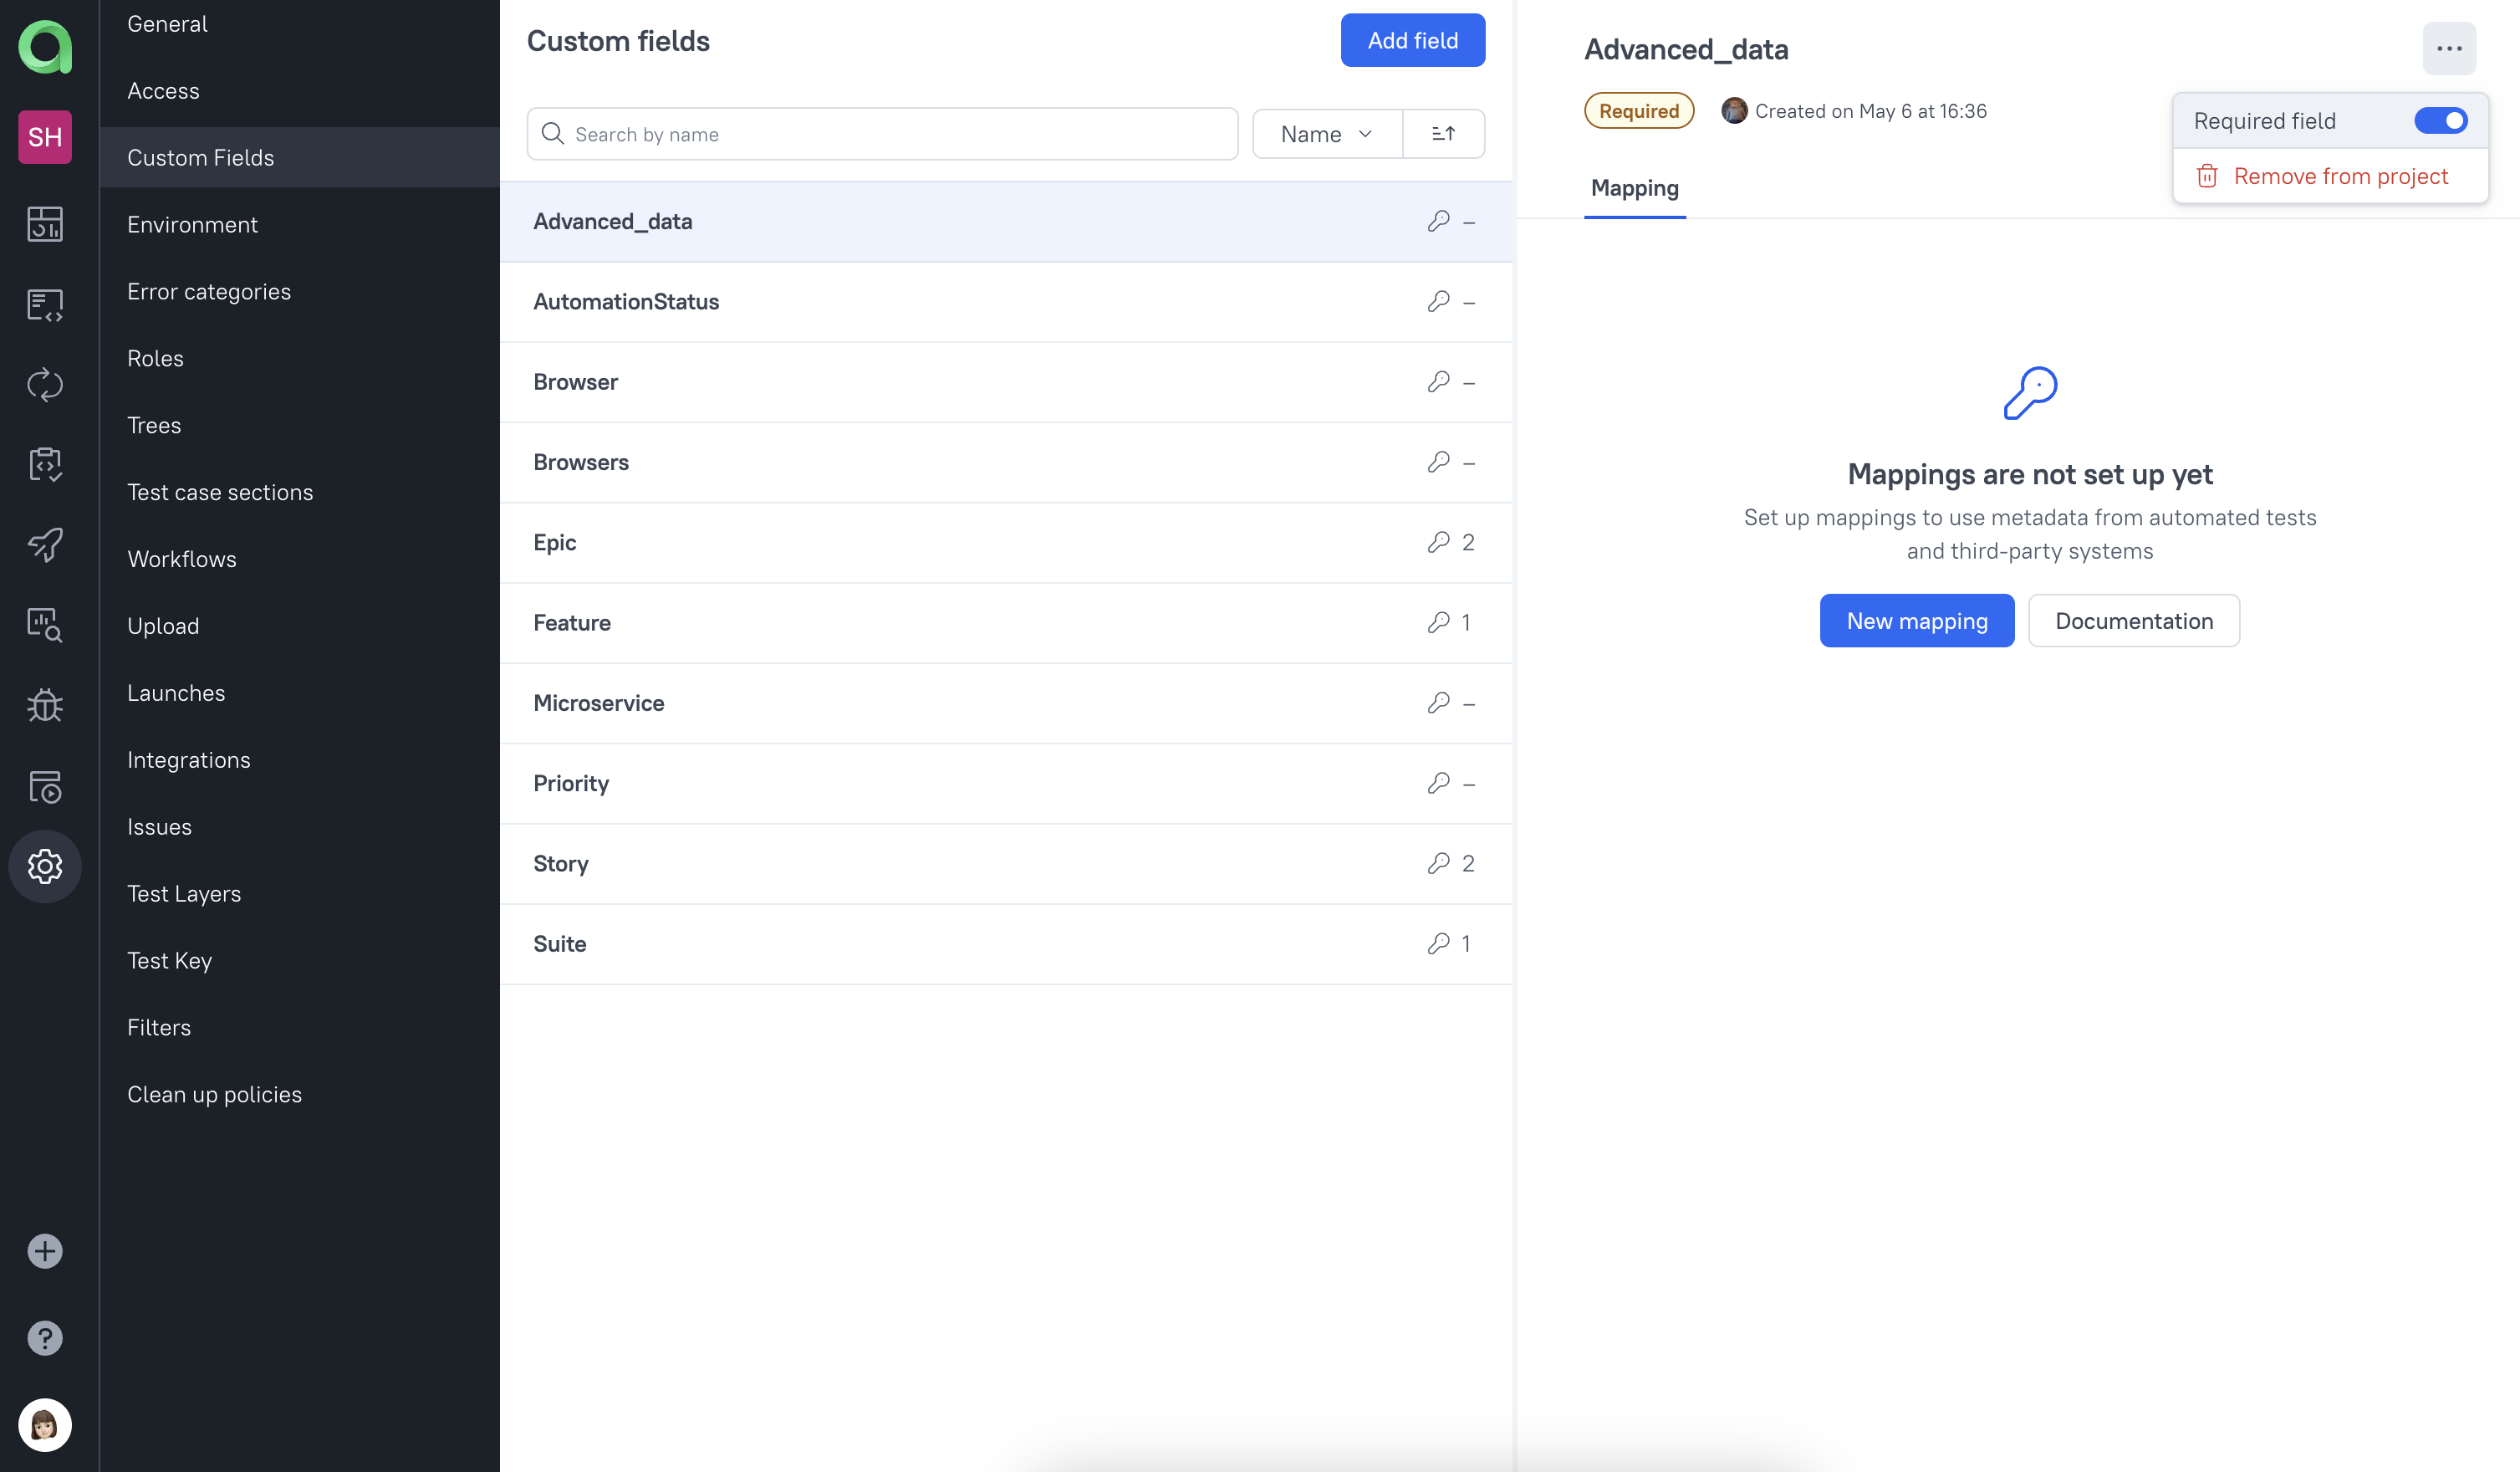
In test cases, required custom fields are highlighted in red when empty:
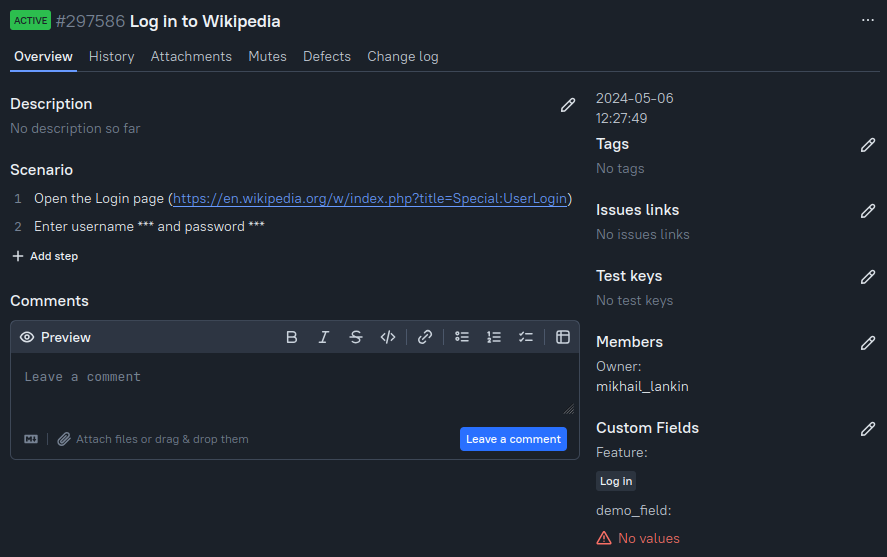
In filters, required custom fields are marked as required with a tooltip.
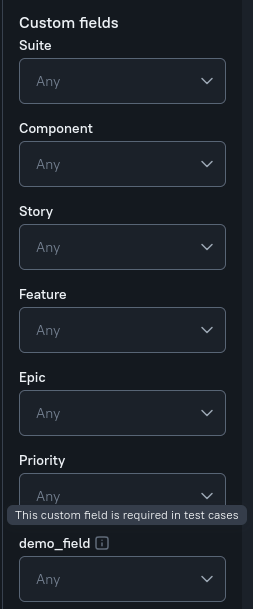
And speaking of filters, it is now possible to filter by empty custom fields, selecting tests in which no value is assigned to a field:

Custom fields of cloned test cases
If you want to clone a test case to another project, that project might not have the custom fields that your test case has. Instead of going to the target project and fiddling with its fields, it is now possible to quickly resolve this situation during cloning.
Select a test case, click the three dots in the upper right corner and click Clone. This will bring up the cloning menu; there, you can toggle Clone to another project, and if the selected project does not have the required custom fields, a sub-panel with three options will appear:

You can choose to transfer the missing fields, map them to existing fields in the target project, or skip them altogether.
Conclusion
Custom fields are a great way to organize your tests. We strive to make managing custom fields quick and safe - hence the bulk operations and the new deleting procedure. Hopefully, those improvements will make your test base easier to maintain!
