Imagine you've got a test base of several thousand automated tests, and on average, about 10% of them fail. You've done a test run, and now, you've got a few hundred failed tests to sort out. This is time that you could spend working on new tests or optimizing your pipeline. And you sort through these failed tests every test run. So if your team runs tests on demand, several times a day, you do this several times a day. Things can get out of hand here.
This is where the Defects feature in Allure TestOps comes in. It allows you to group bugs by cause, and if you set up a rule the system will sort everything automatically. Let's dig into the specifics of how it's done, step by step - we've made an in-depth video tutorial about Defects:
This is the written version of the tutorial, so if that's more your thing - read on! You could also take a look at the documentation page about Defects.
Our test application
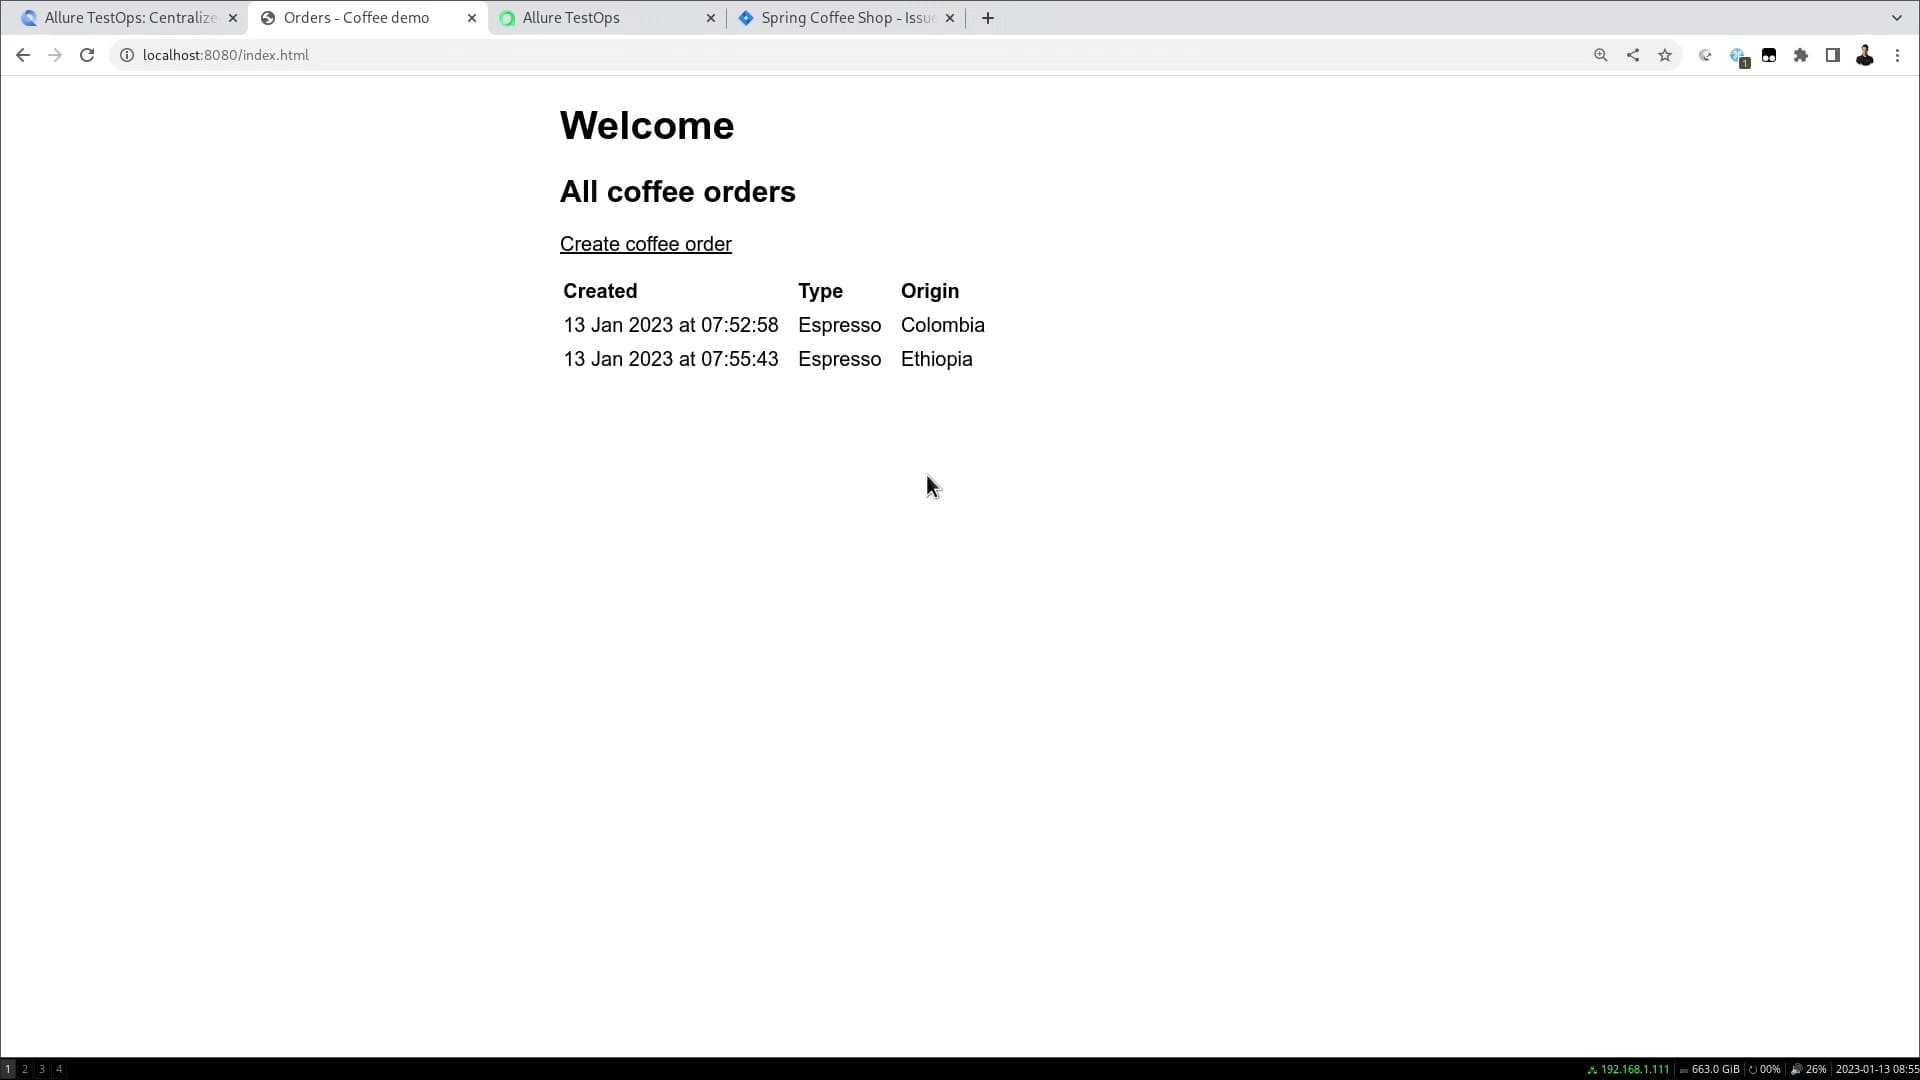
For our demonstration, we've set up a very simple web app written in Java that creates coffee orders:
We also have some basic tests for this app, both unit tests and integration tests on Selenide. We'll be running these with Allure TestOps integrated with Jira.
The first bug appears
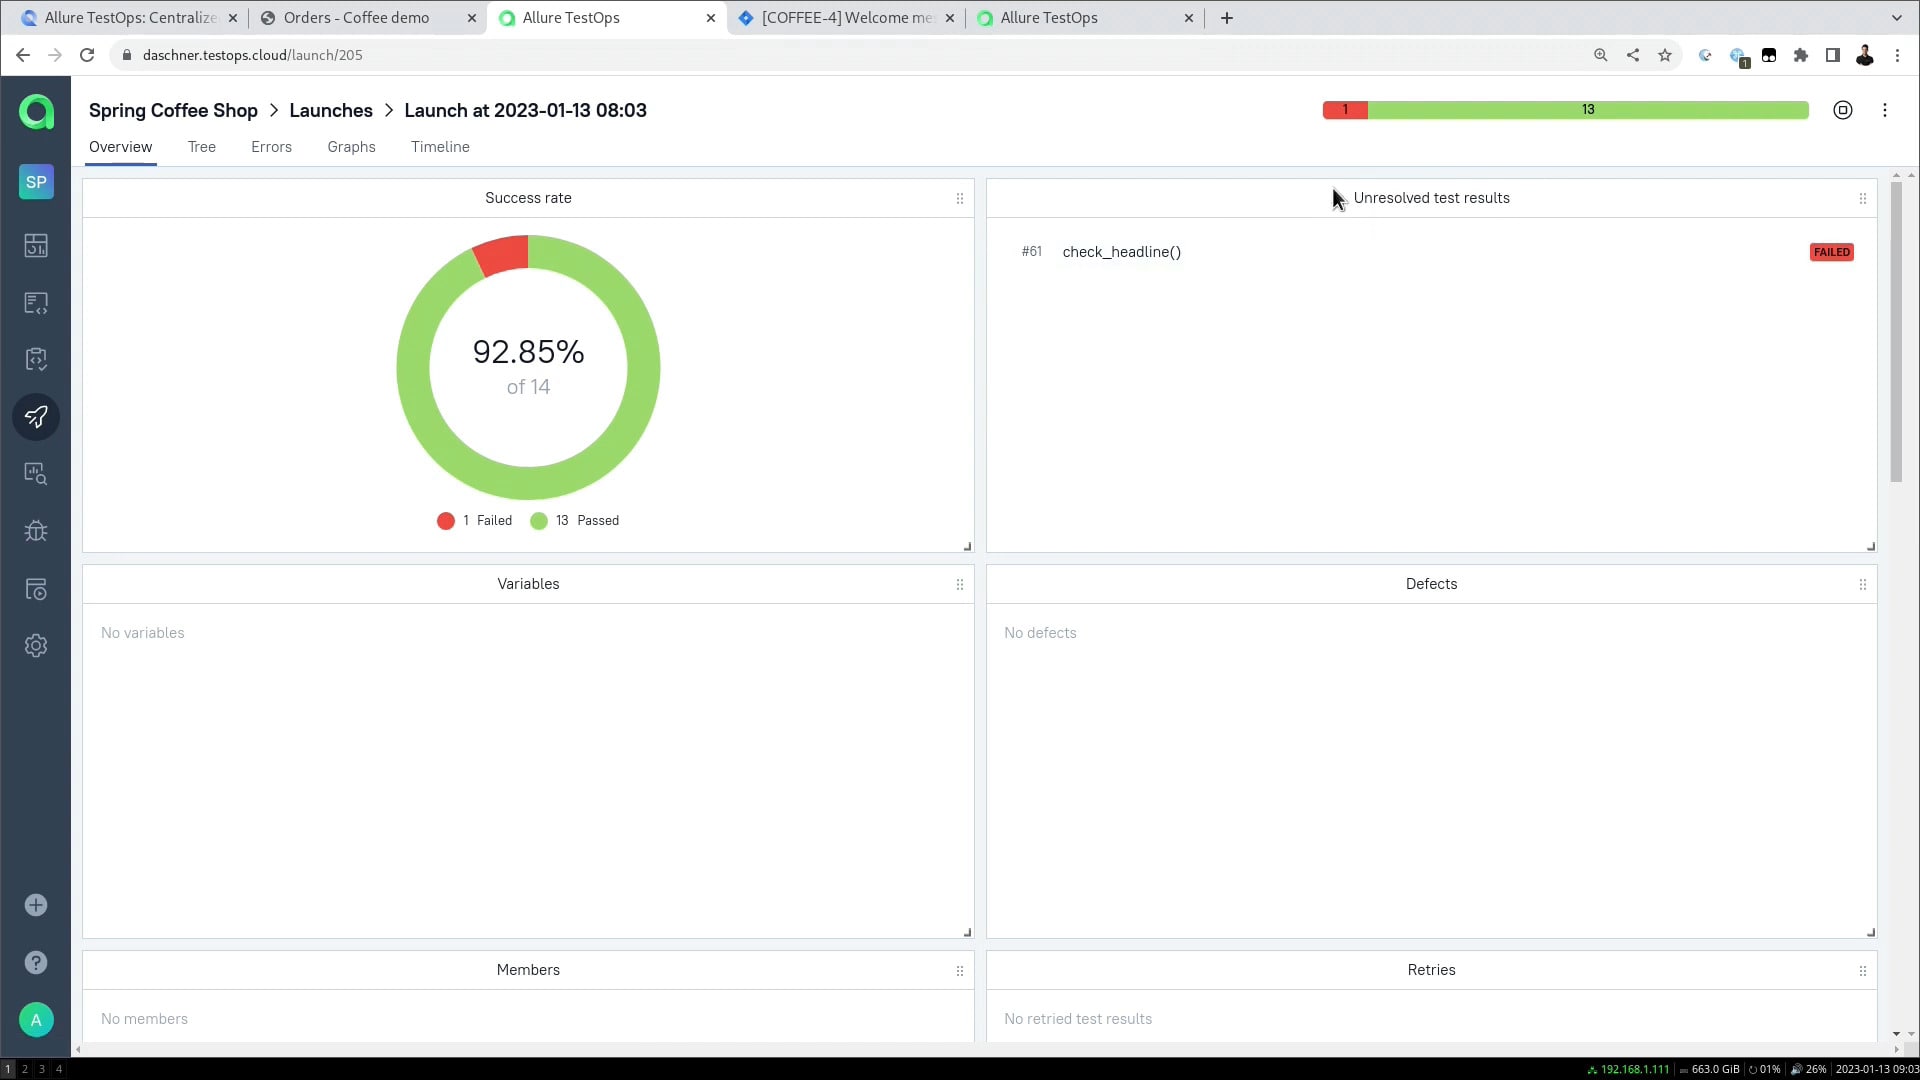
Let's say that we need the heading on our webpage to read "Welcome!" rather than "Welcome". This is a problem that needs to be fixed, so we create a ticket in Jira, and then write a related test that will check the content of the heading. If we run it now, it will fail and produce an unresolved test result:
In the Tree tab under Launches, we can view a full description of the test result:
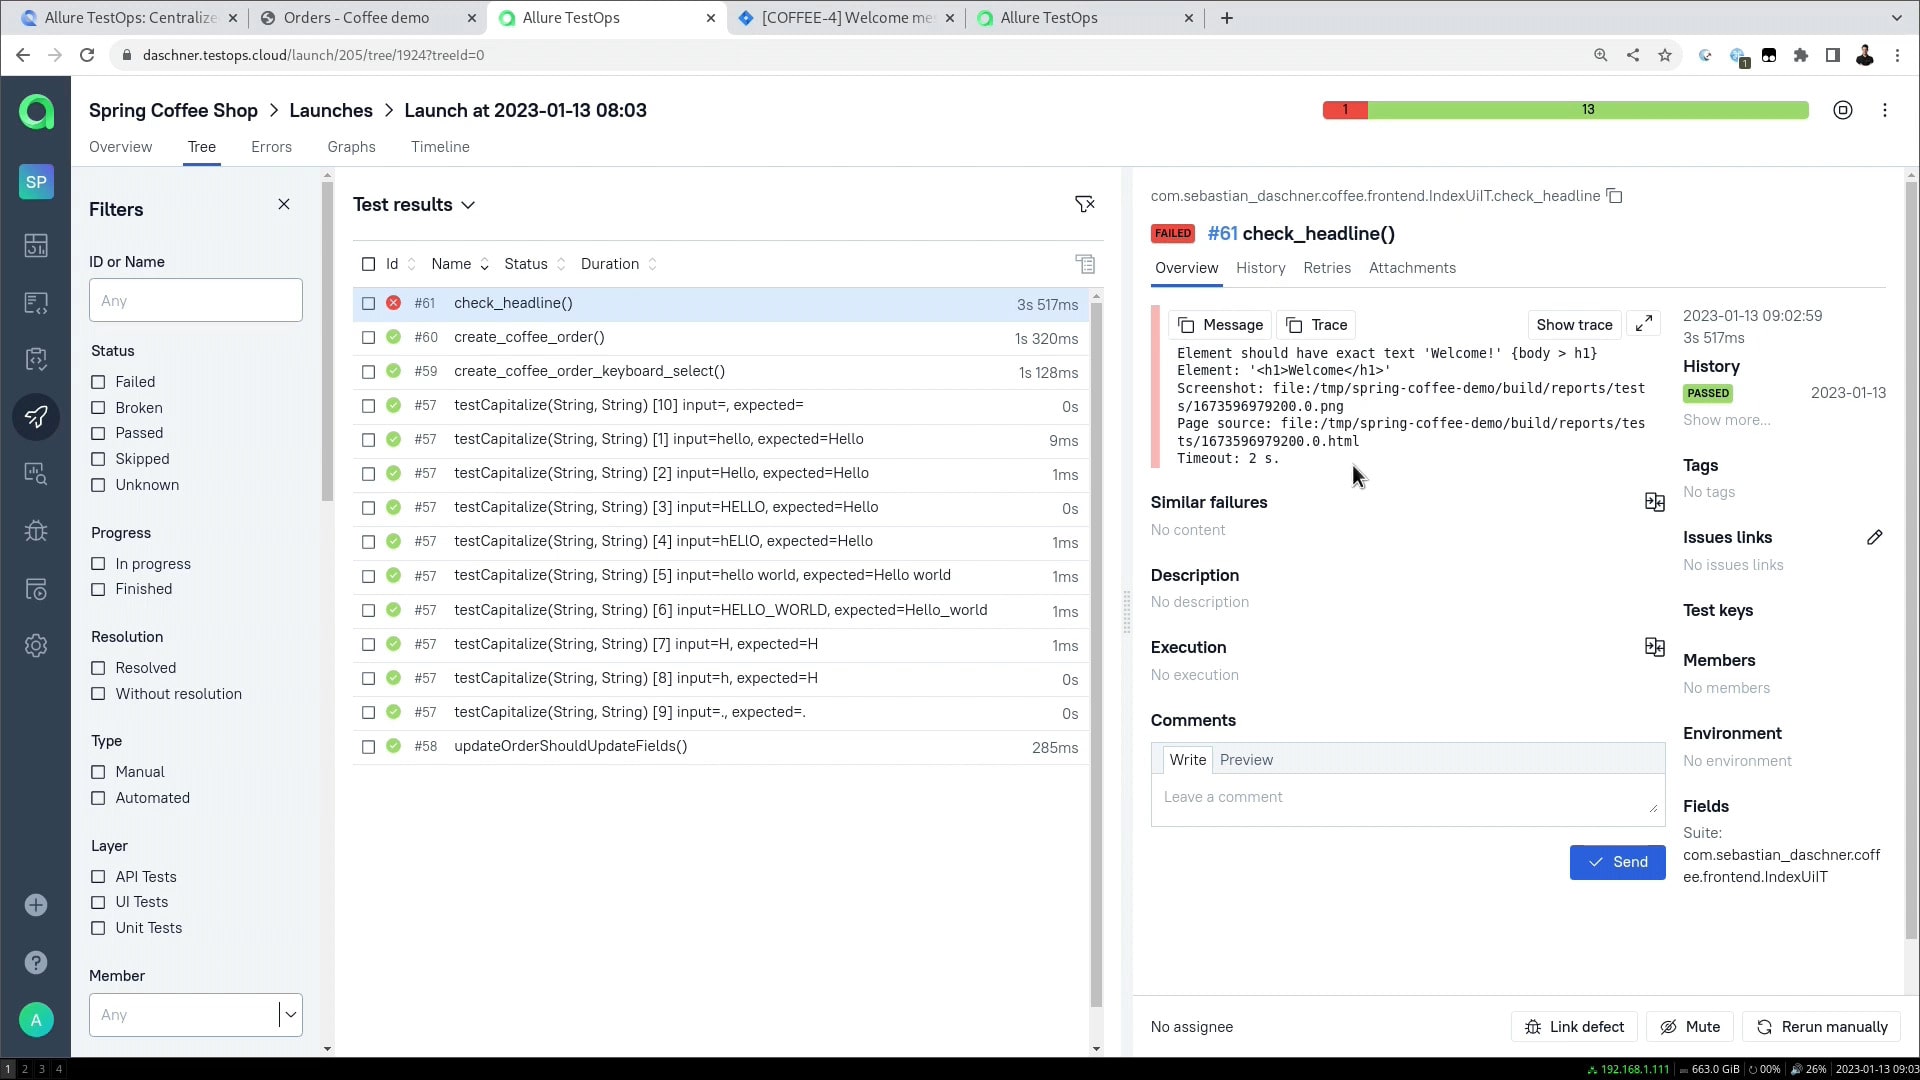
For now, this result is not linked to anything.
Enter the Defects
We can create our first defect in the Defects section of the sidebar, or just press Link defect at the bottom of the screen of the Tree tab:
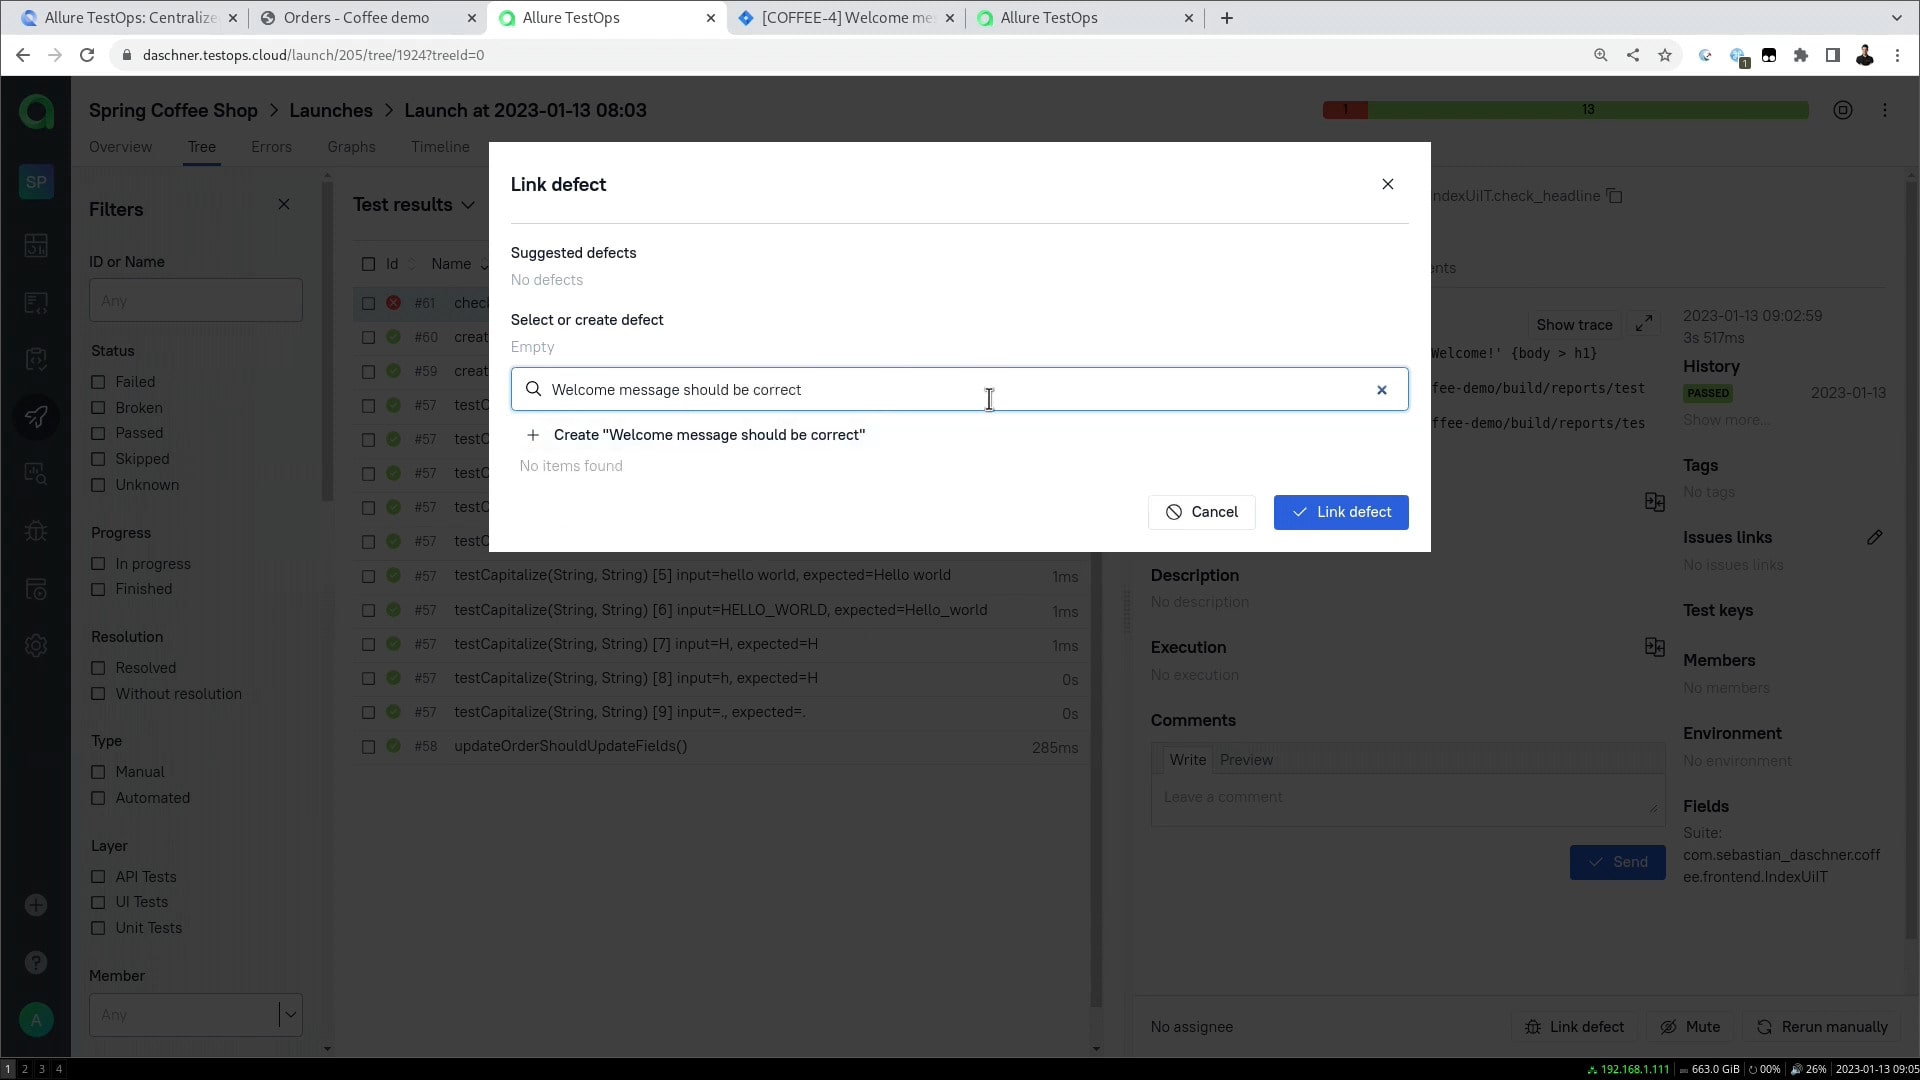
A new defect will then be created which we can then fill in. And here's what will save you loads of time: in this menu, you can create automation rules for defects.
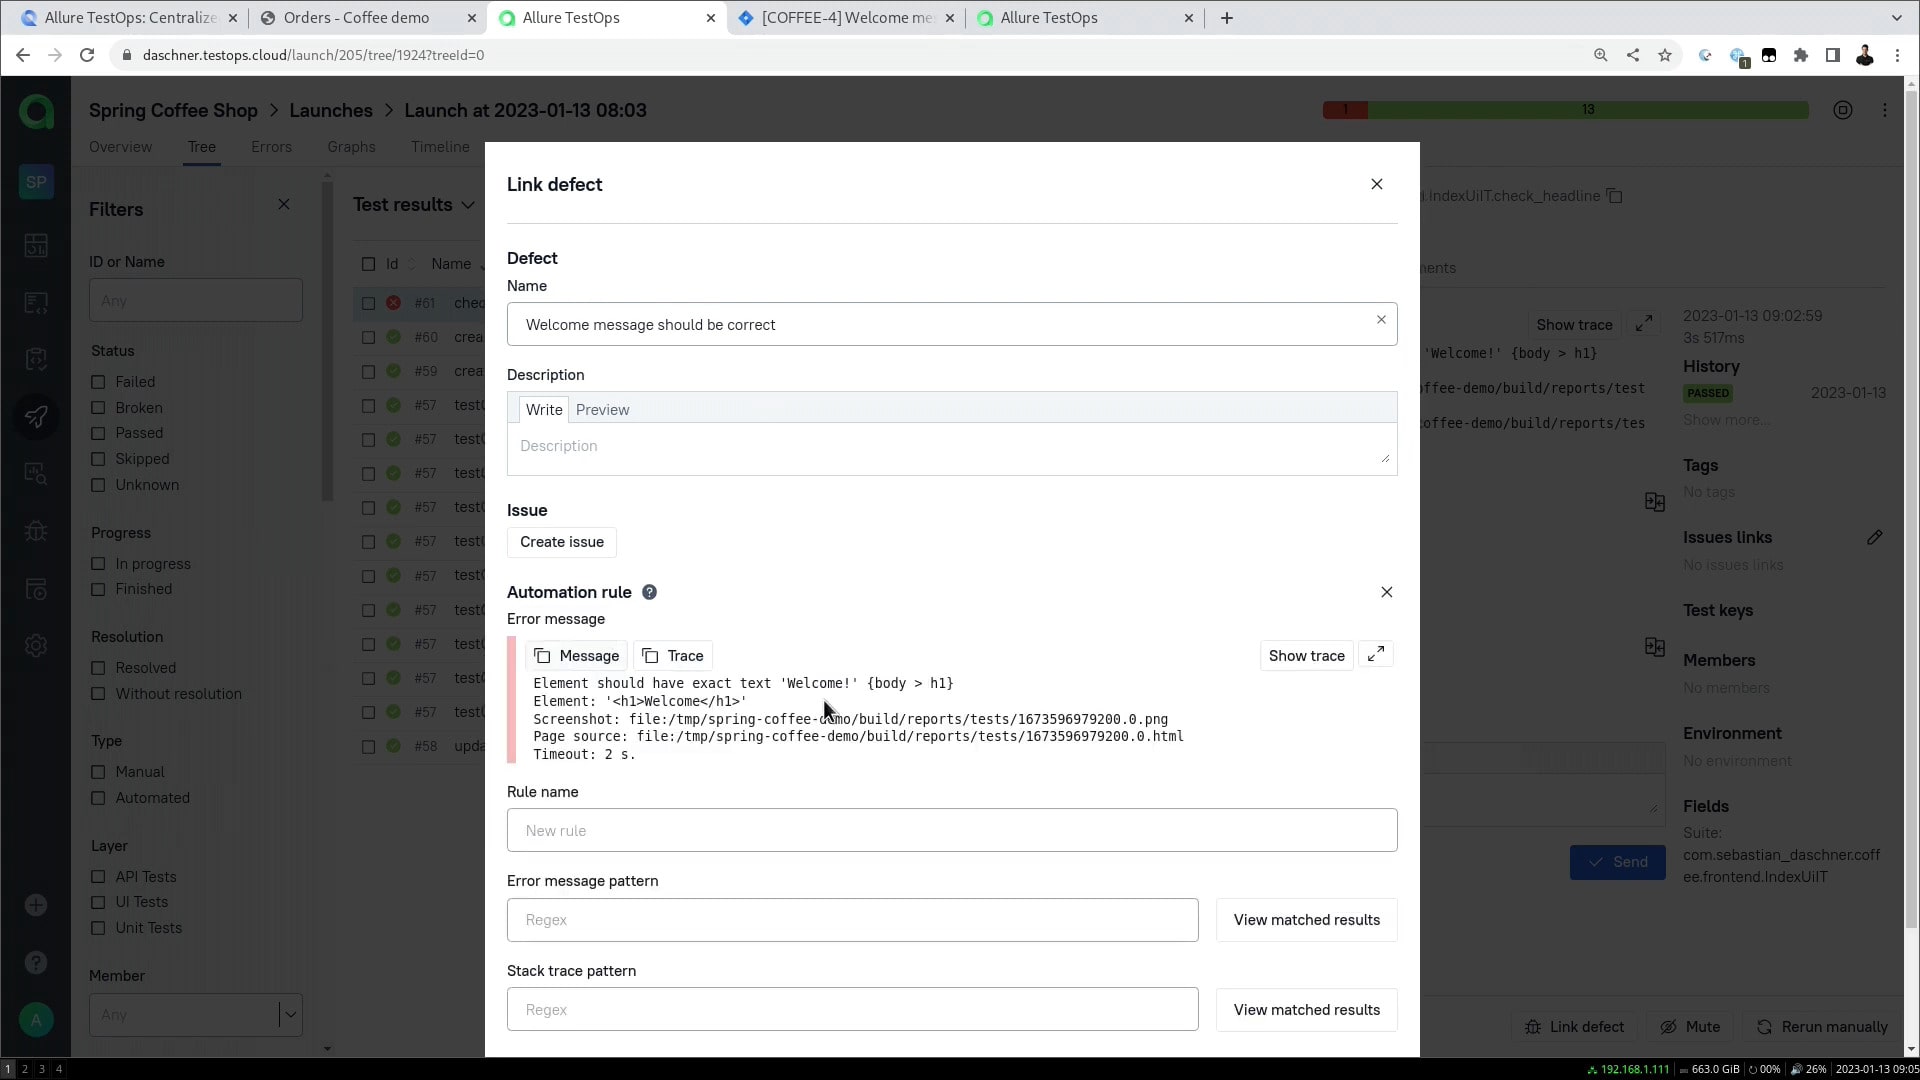
The automation rules traverse error messages and stack traces from bugs with a regex that you can specify, and if a test result matches that expression, the system will link it to the defect. When you're creating the rule, there is an option to view all matched results immediately to know if the rule is working as expected. When ready, the rule will automatically sort the test results on all subsequent test runs until the defect is closed. This means that instead of digging through a hundred failed tests, you'll only need to look at a dozen defects.
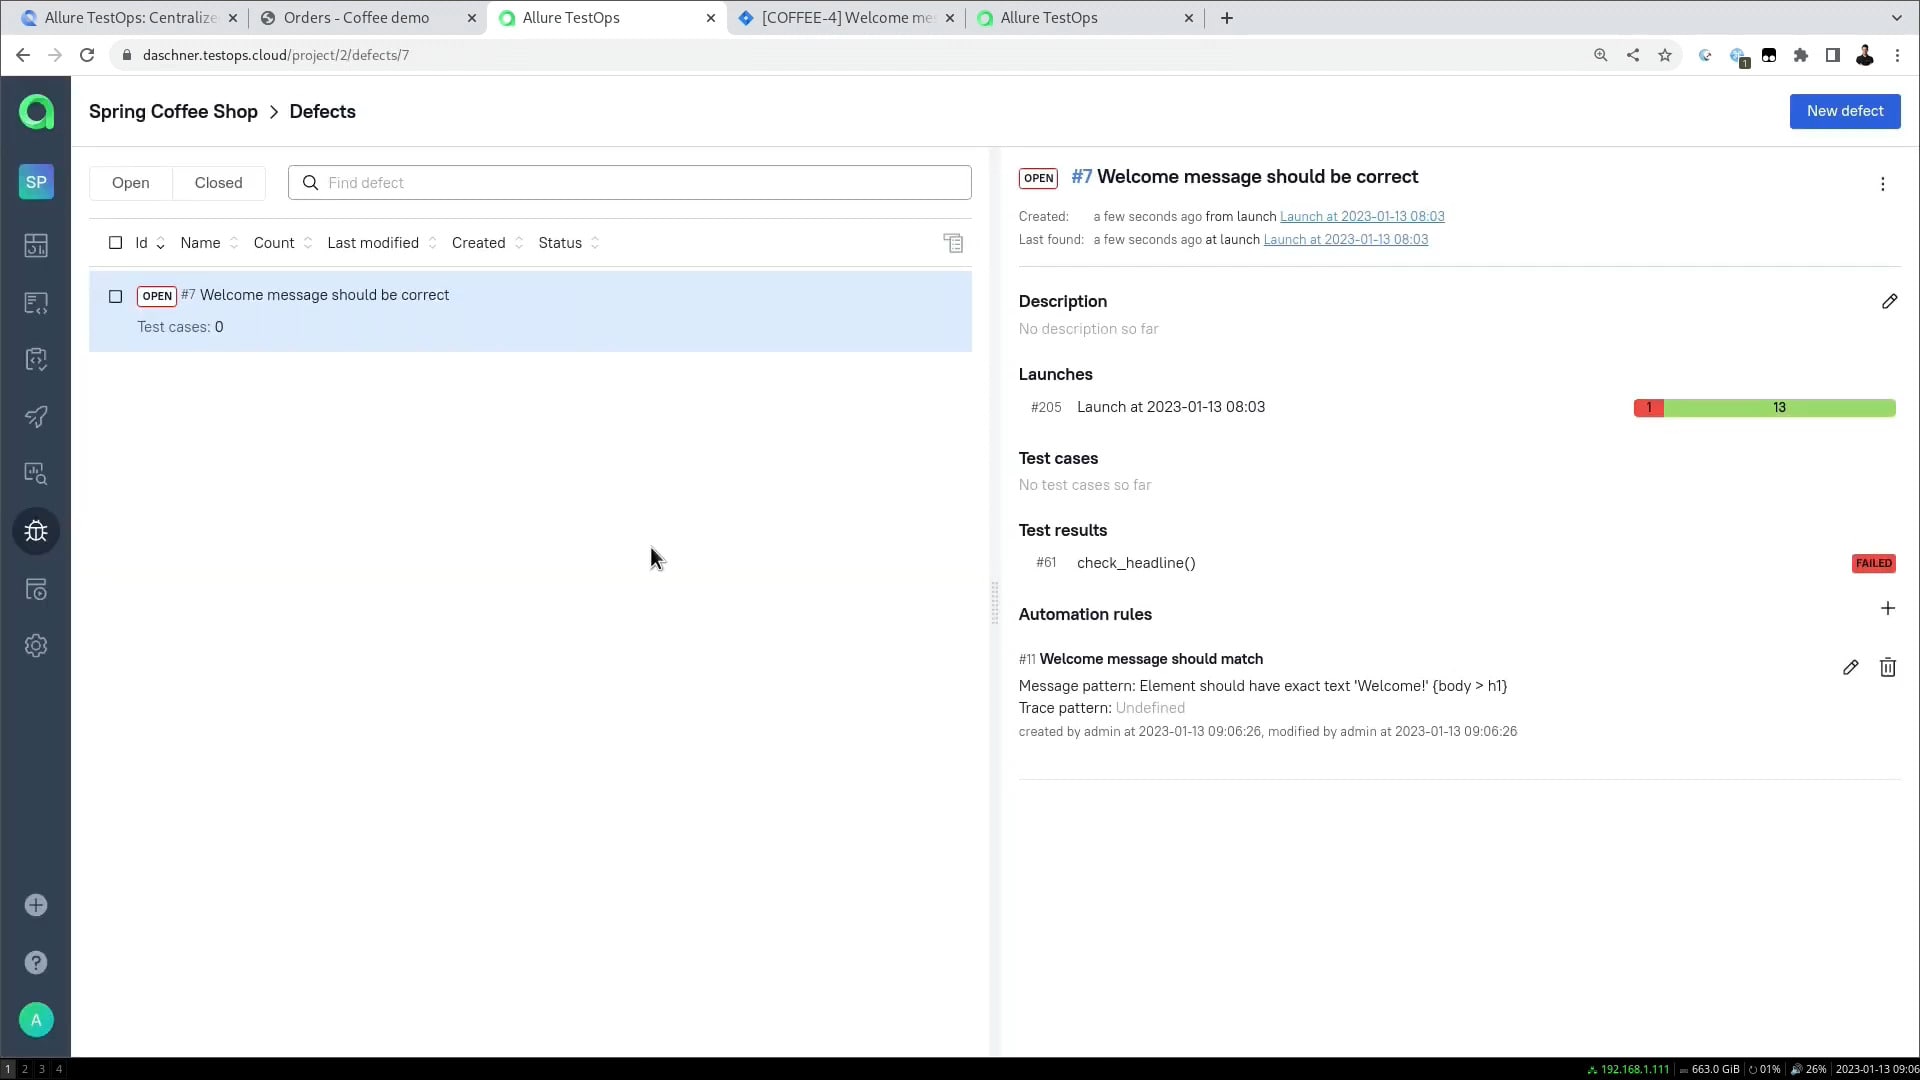
Once everything is set up, we can view our defect in the Defects tab of the sidebar:
And if we've linked our test result to a defect, then back in the Launches tab, the result is no longer unresolved:
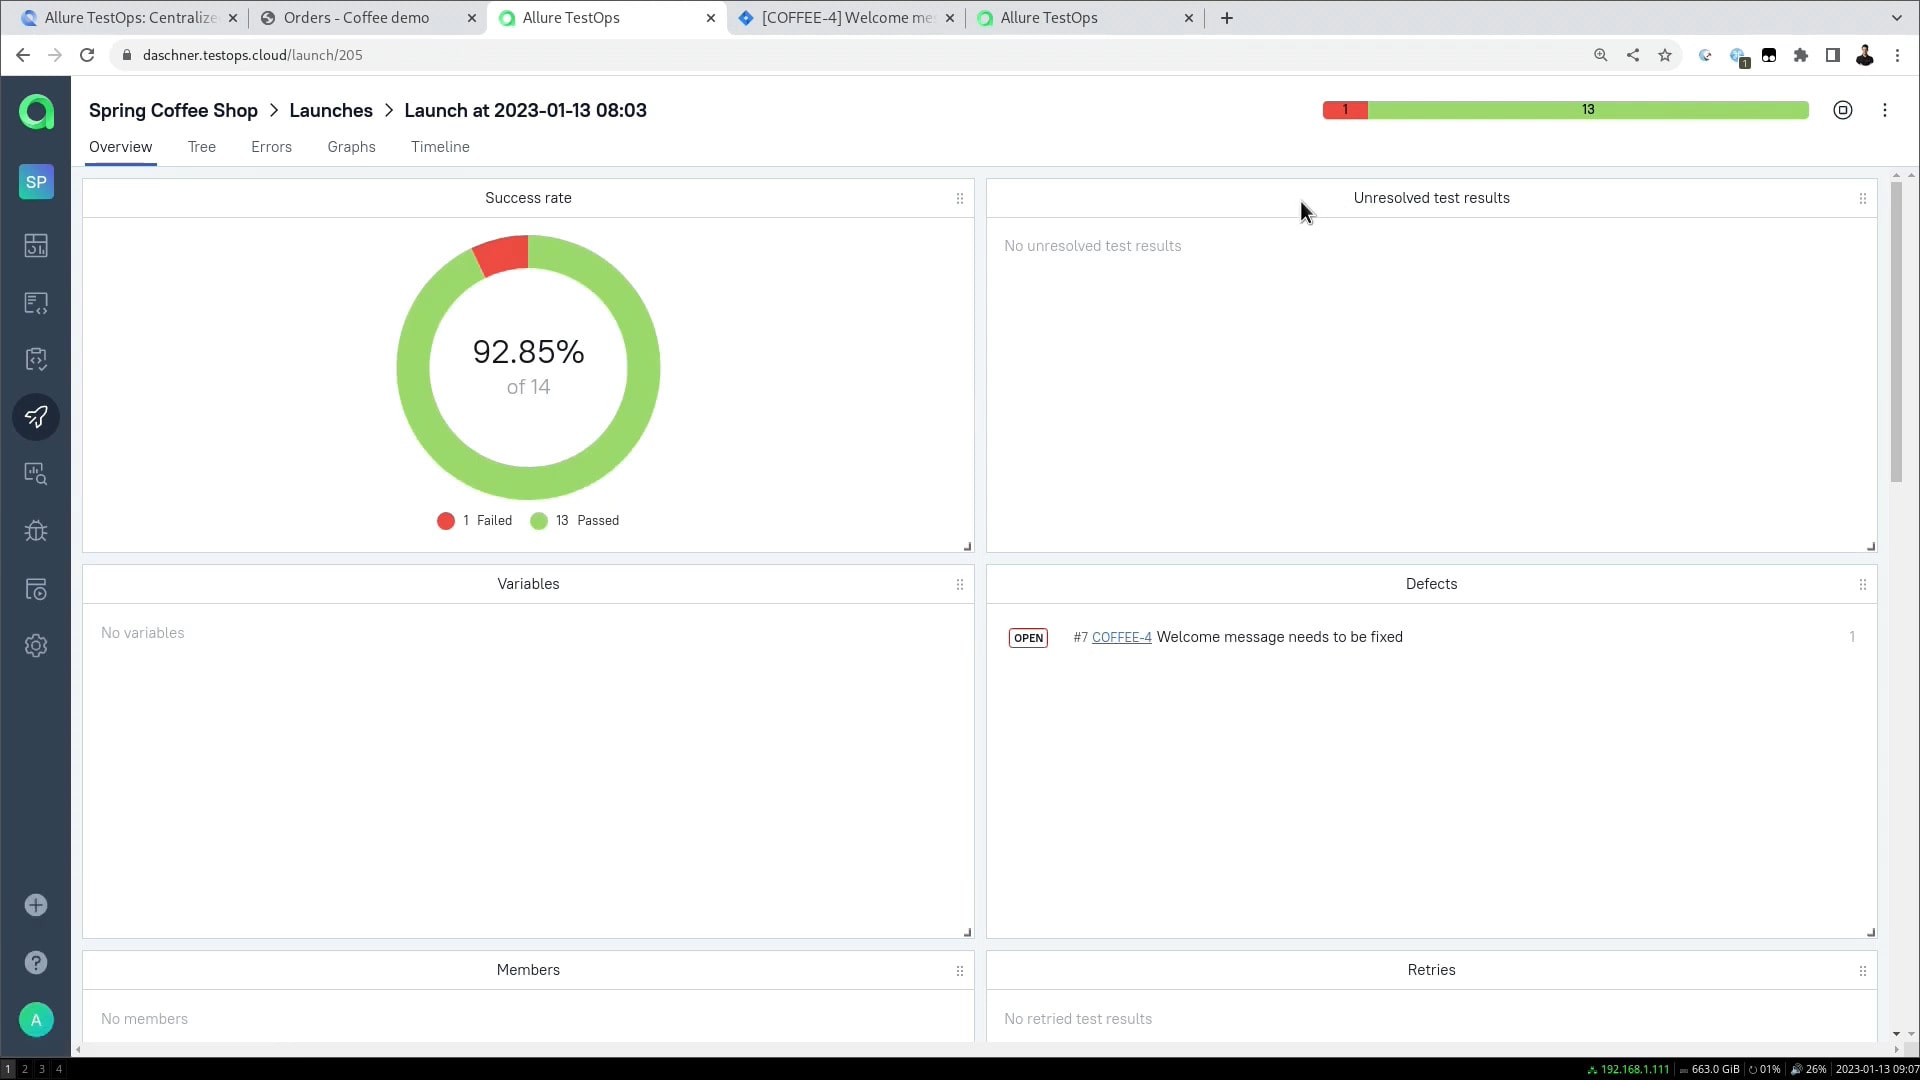
It's still going to be failed, but the cause is now known and sorted.
Linking defects and issues
Now that we have a defect, we can create a new issue for an issue tracker like Jira, or link the defect to an existing issue:
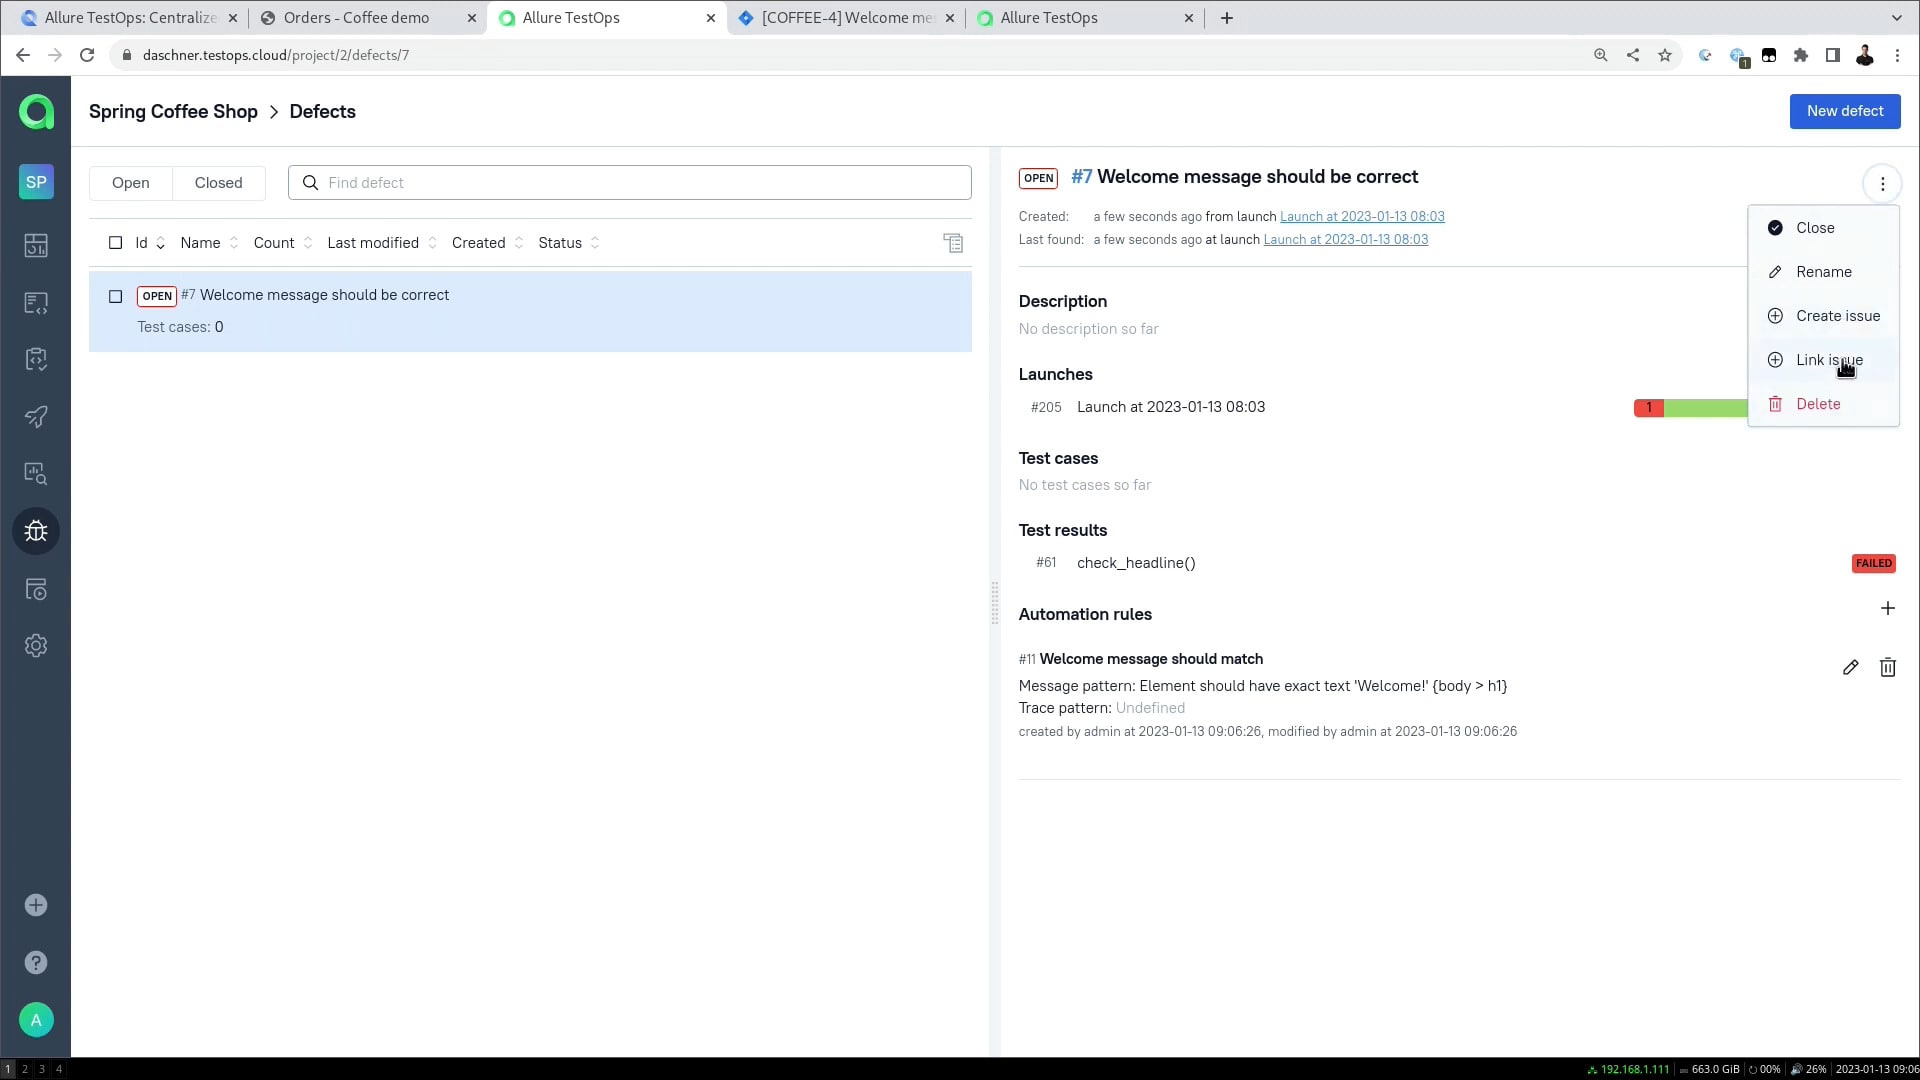
And this is not just for show: if you set your issue to "Done" in Jira, the defect in Allure TestOps will be closed automatically.
A defect reappears
But what if we get a bug that is related to a defect that we've already closed? The test result for that bug is going to be unresolved and the automation won't kick in. This is intentional: if the defect is already closed but bugs are still appearing, the situation is unexpected and it definitely requires our attention!
Summary
The Defects feature in Allure TestOps divides all your test results into two main categories:
- The ones caused by known issues that are in the process of being analyzed and fixed
- New ones that have not been resolved yet
This saves a huge amount of time and makes your testing much more controllable. The whole process feels something like this:
